3D Printing Joints
Links & Resources
- 3D printing press fit parts
- 3D printed joinery
- Snap-fit joints for plastics
- Snap-fit design manual
- Buckle example
- 3D Printed Captured Nuts
- Fasteners and 3D printed parts
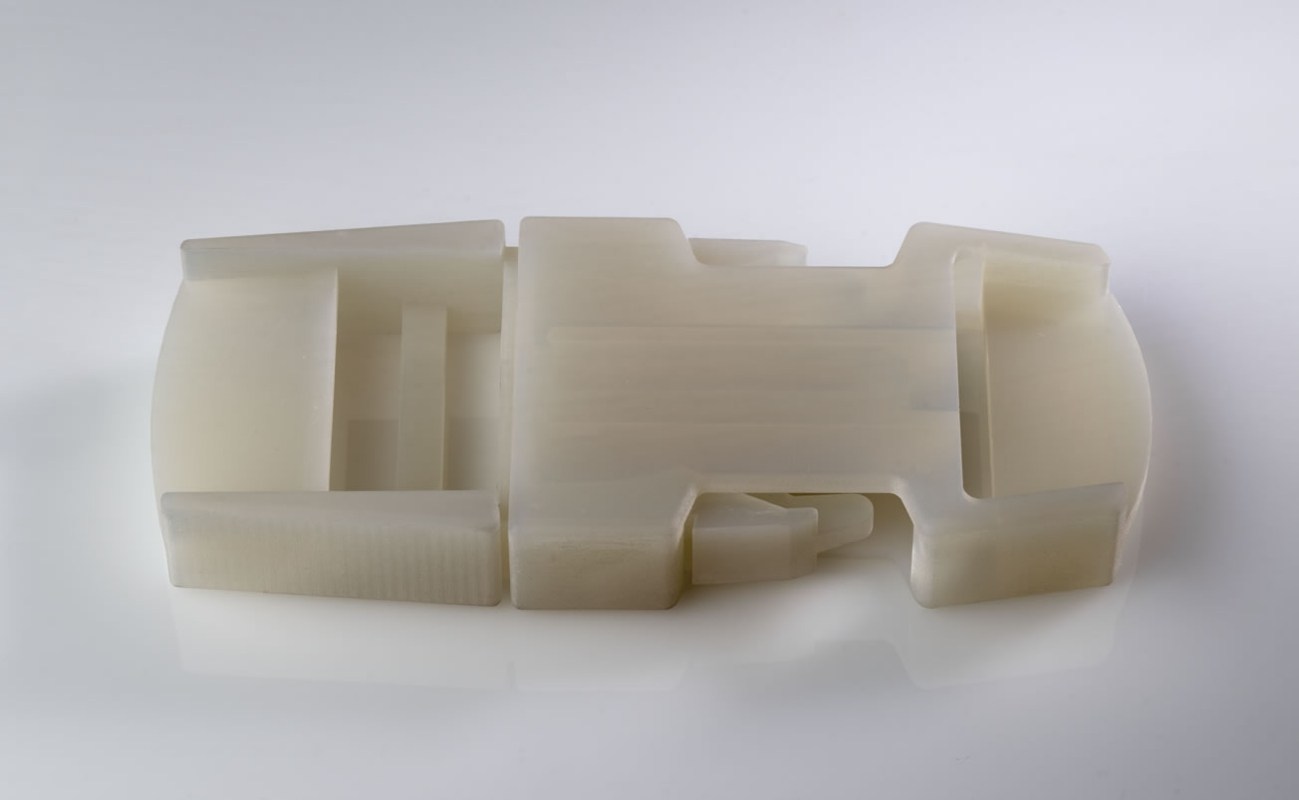
Joinery Techniques for 3D printing
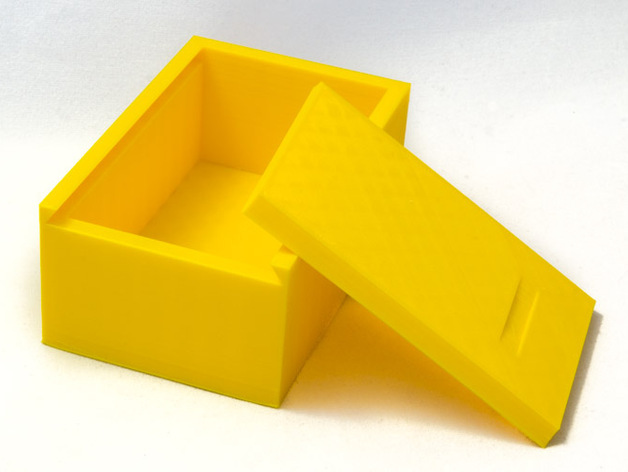
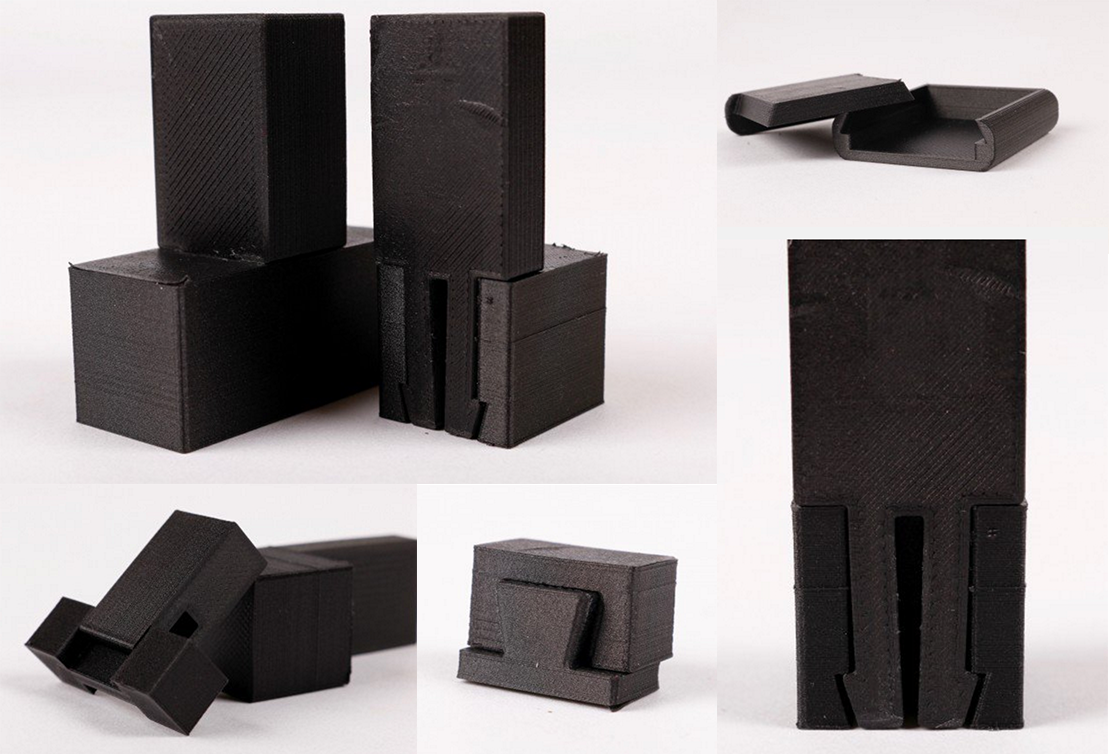
Sliding Fit Assembly – Applying traditional woodworking joinery to 3D printed parts.
Press-Fit Assembly – Using the friction between two components to hold something in place. A good example for this are lego bricks. They have such a precise tolerance that pieces can snap and come apart with no problems.
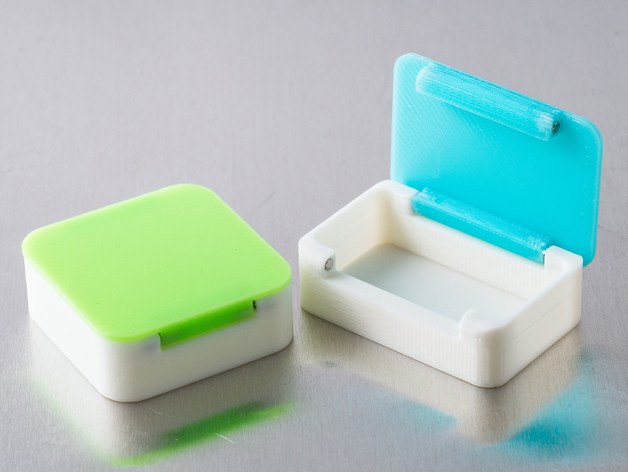
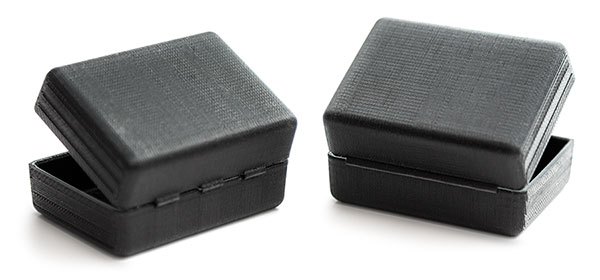
Snap-Fit Assembly
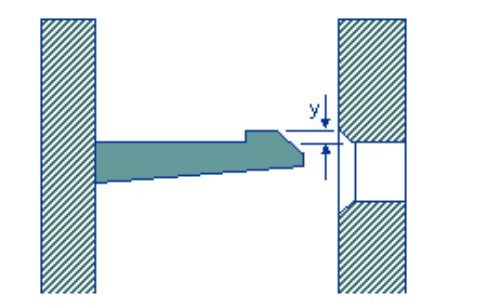
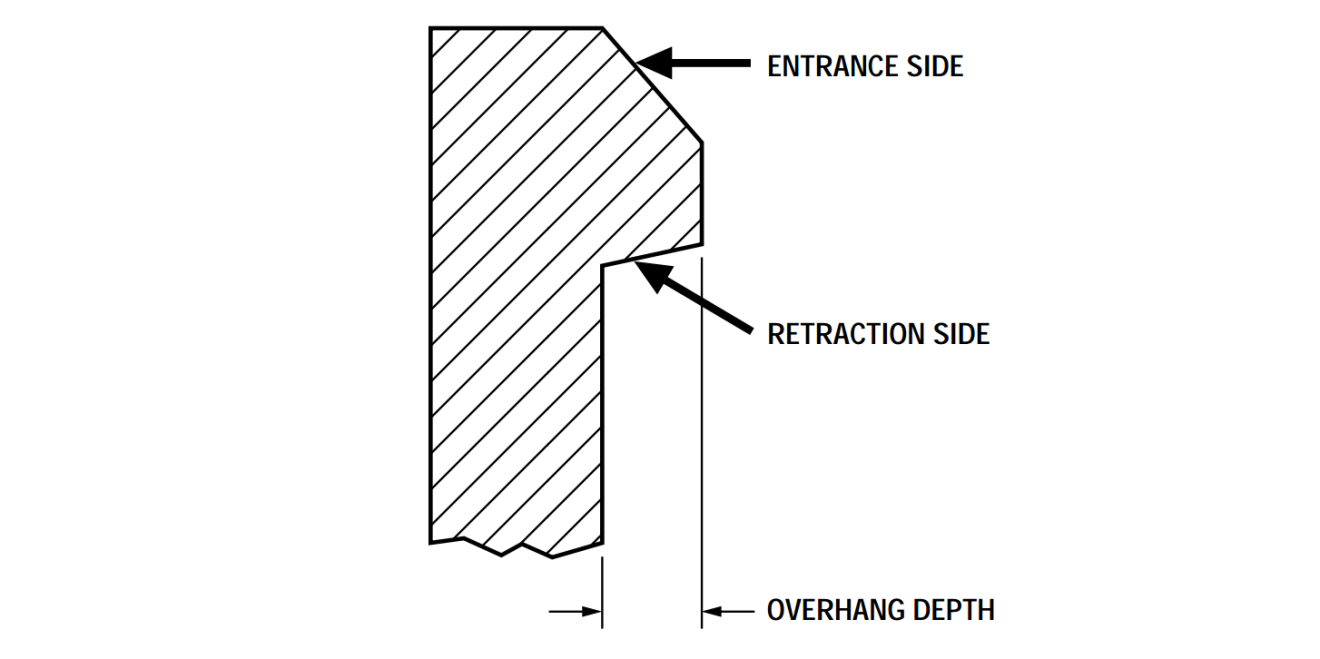
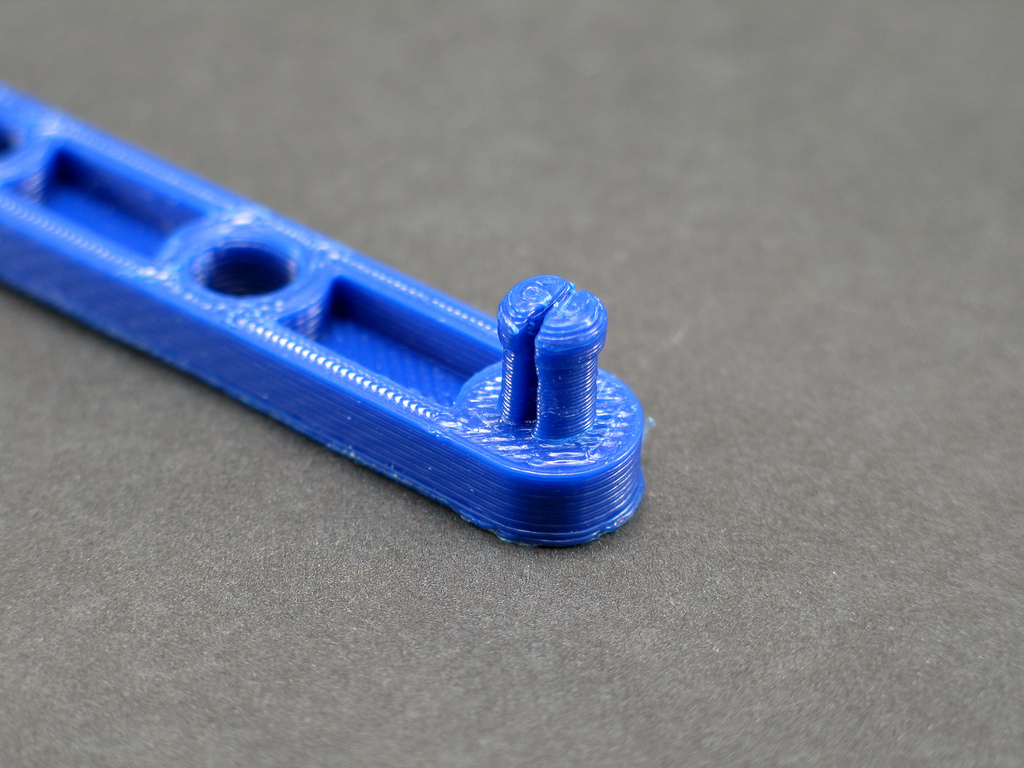
Cantilever Snap joints – are the most common – Typically, a semi-flexible cantilevering hook is deflected slightly as it is inserted into a hole or past a latch plate. As the hook passes the edge of the hole, the cantilever beam returns to its original shape.

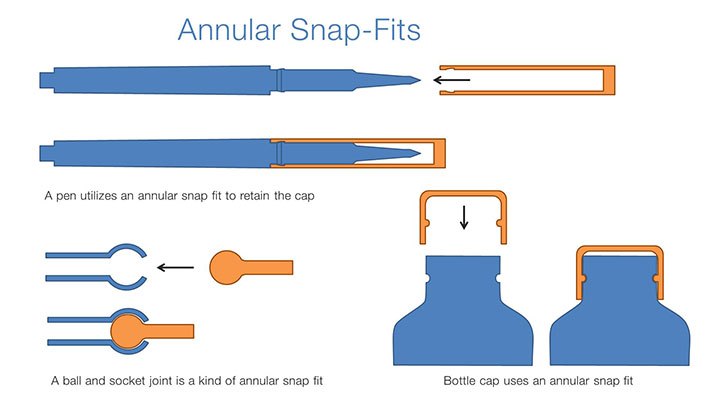
Annular snap joints – Great for circular applications – Classic examples of ASJs include ballpoint pens with snap-on caps, and the child-resistant cap on Tylenol bottles. One piece is more flexible than the other – in this case when you’re using the same material, that means one piece is thinner and therefore more flexible.
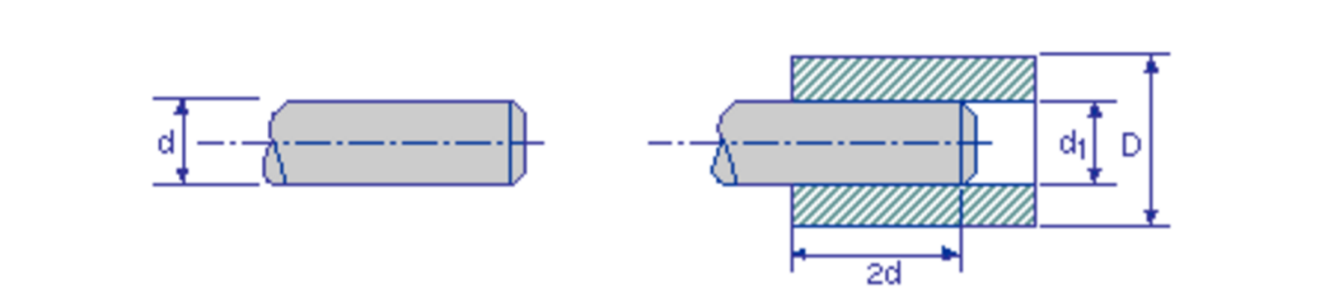
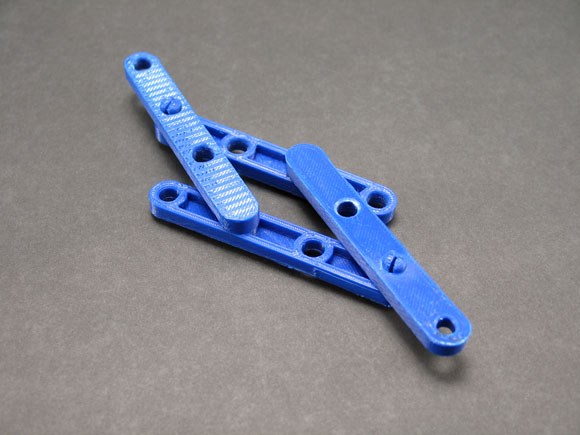
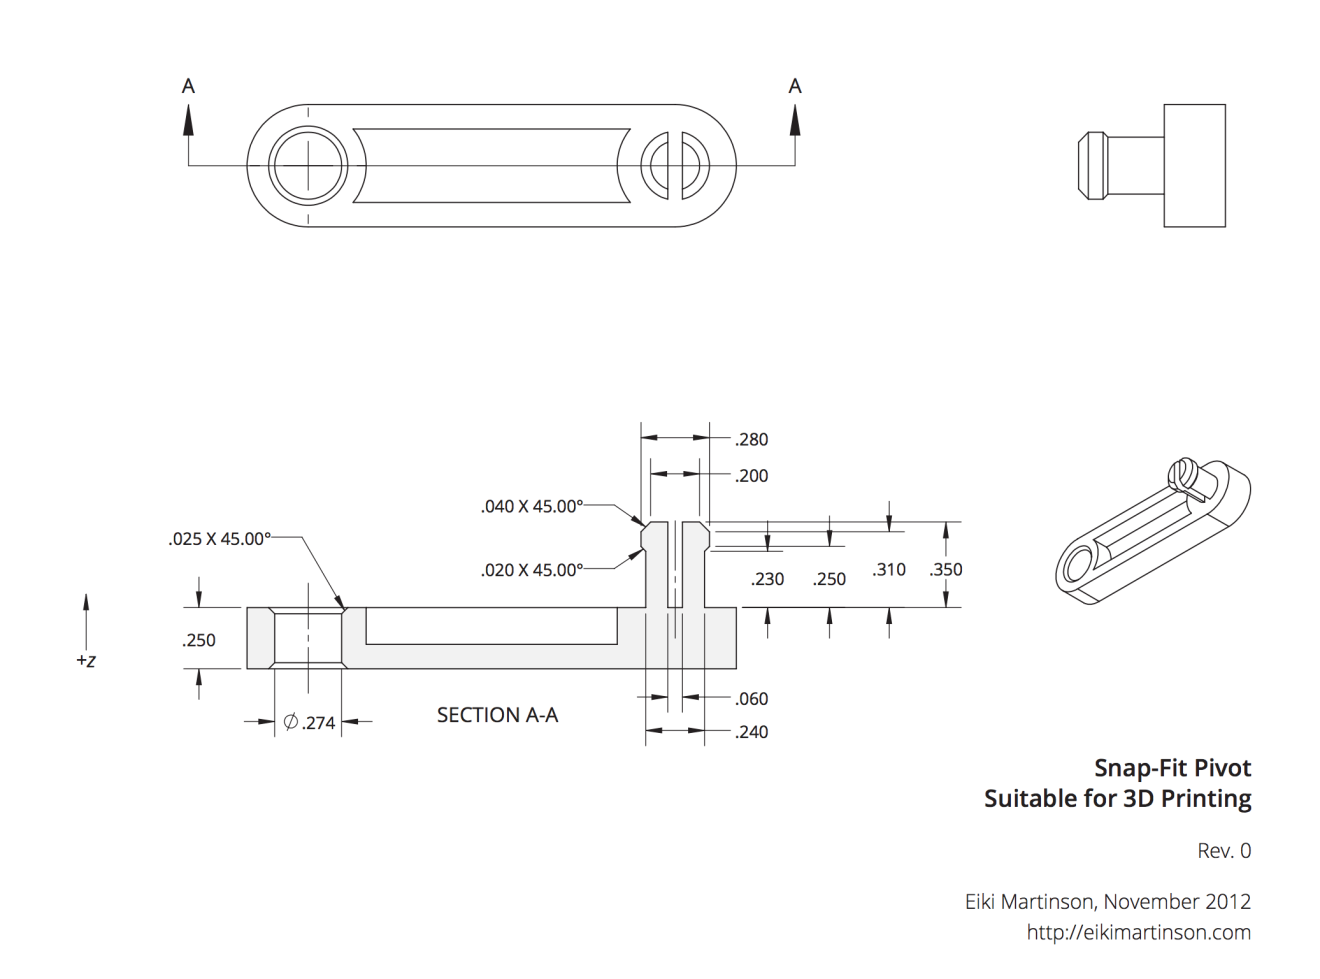
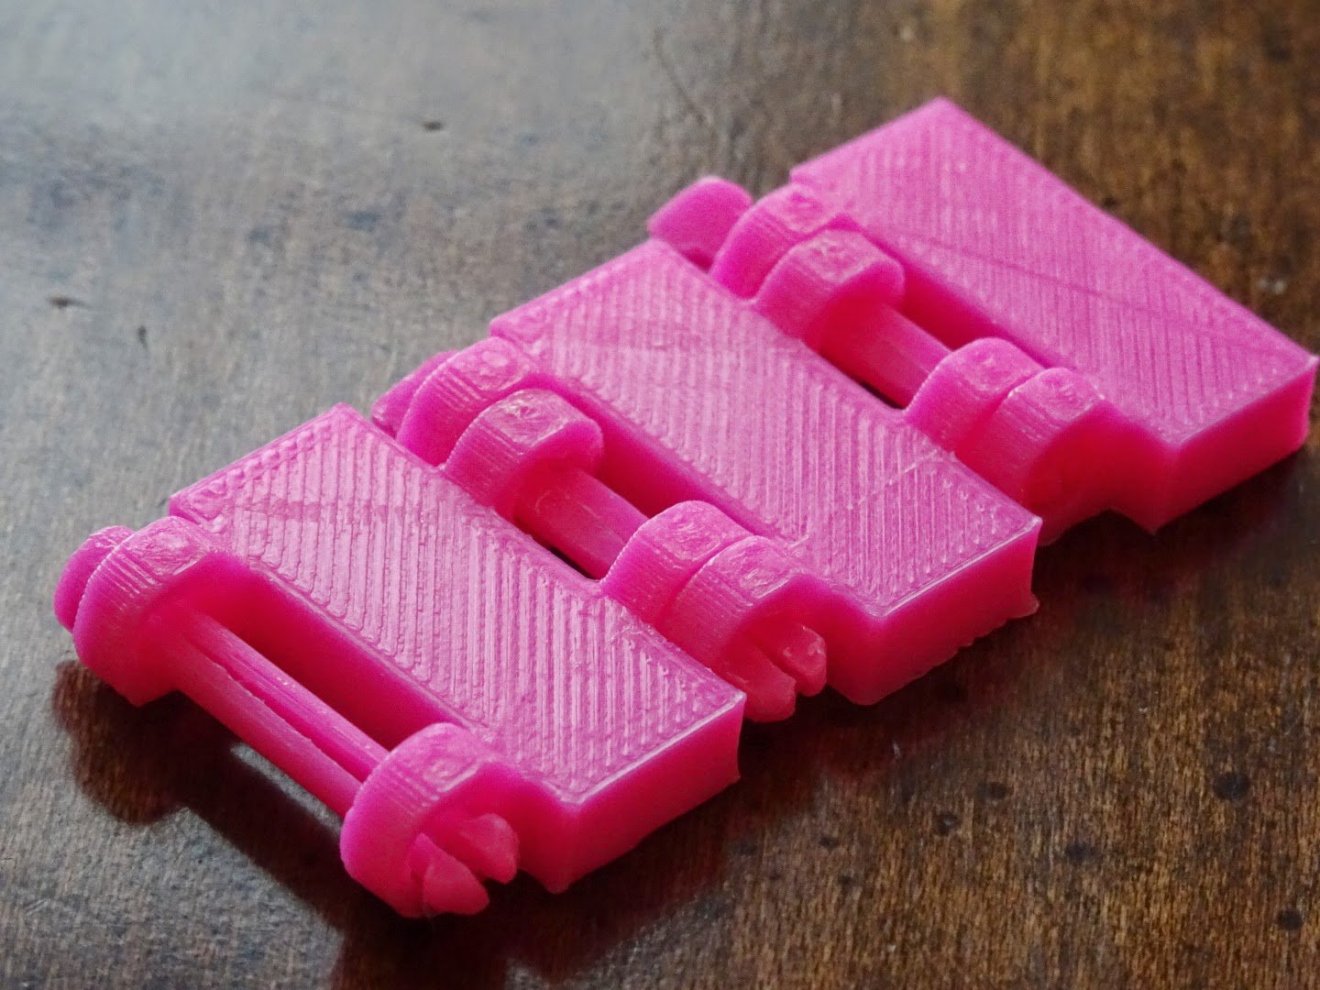
Ball Joints
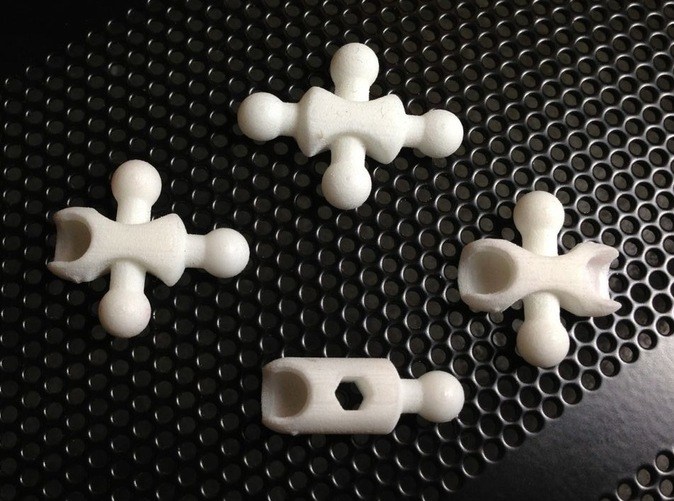
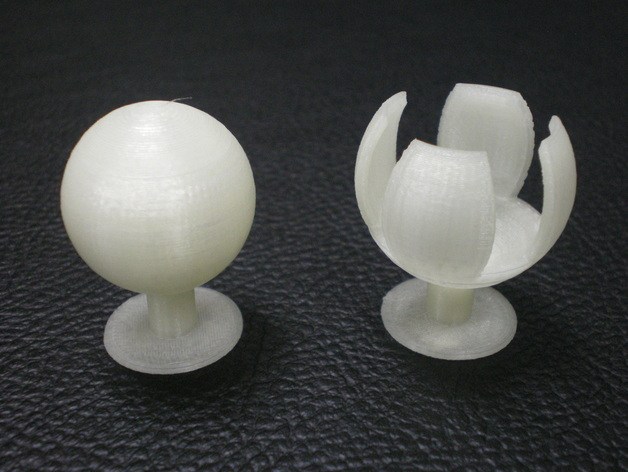
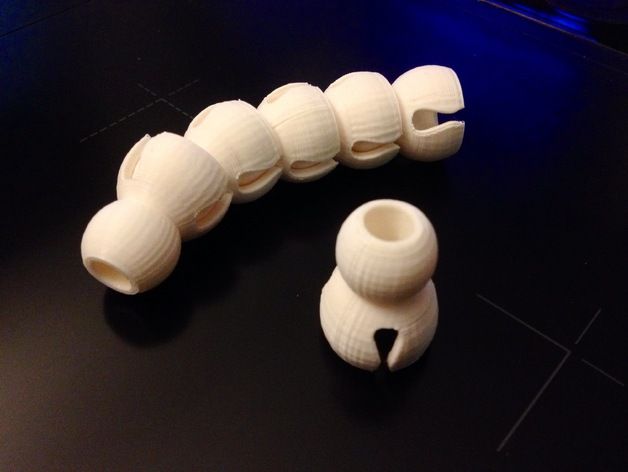
Hinges - Snap fit pivots - A good way to print a hinged pivot point. One component uses a protruding annular ball joint. The protrusion is split in half. When the component is being inserted, this gap allows the two halves to deflect and squeeze together. Once the piece is through the hole, pressure is released and the ball expands again to hold the piece in place.
http://www.thingiverse.com/thing:59332
http://www.caddedge.com/stratasys/3d-printing-blog/3d-printing-living-hinge-protoytpes
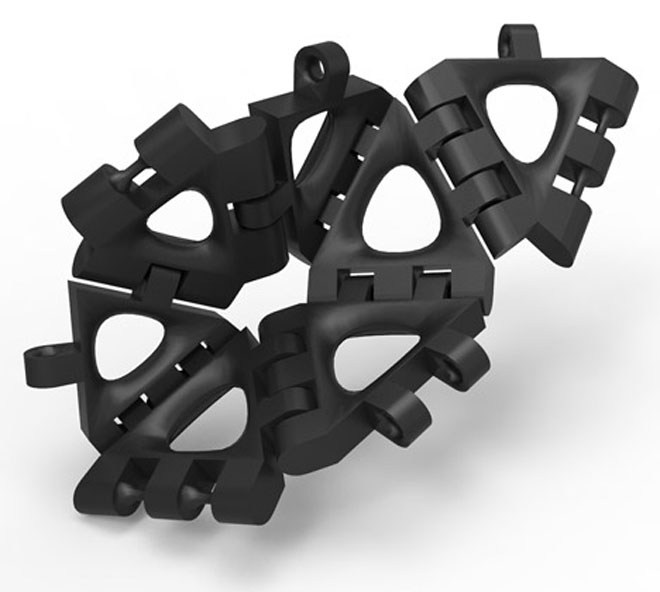
Kinematics by n-e-r-v-o-u-s http://www.thingiverse.com/thing:195497
Tips for designing snapping and fitted joints:
1. Experiment with clearance sizes
Usually when fitting two parts together and printing on a desktop FDM printer, the male and female parts of the joint must have a certain clearance between to account for material tolerance. This clearance can vary anywhere from 0.1mm – 0.3mm depending on the printer resolution, material, speed, and more.
2. Test early and often
It’s good to test your connections to find the right tolerance. To avoid wasting time and material, print only the parts you are trying to test instead of the entire model.
3. Building up snaps in the Z-layer has the least amount of strength
Try to avoid printing your snaps in the Z direction (built up from the print bed vertically), they are much weaker than parts printed in the x/y direction.
4. Be careful with scaling
It is always best to model your parts at the right scale. But when you do need to scale a model with connecting parts, it will require you to readjust your tolerances.
Fasteners – using hardware with your 3D printed parts
Self Threading Screws
This is a great technique for a quick and dirty prototype. Using self tapping screws is quick, cheap and requires minimal design efforts.
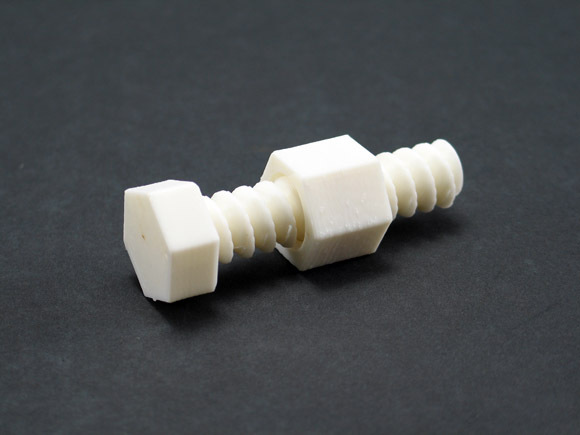
Custom Designed Threads in Your 3D Model
If you are using something with large threads, it is best to design them since trying to self tap would require a huge effort. This is only advised for large components (when printing on desktop FDM printers) – the resolution is not adequate for small machined components.
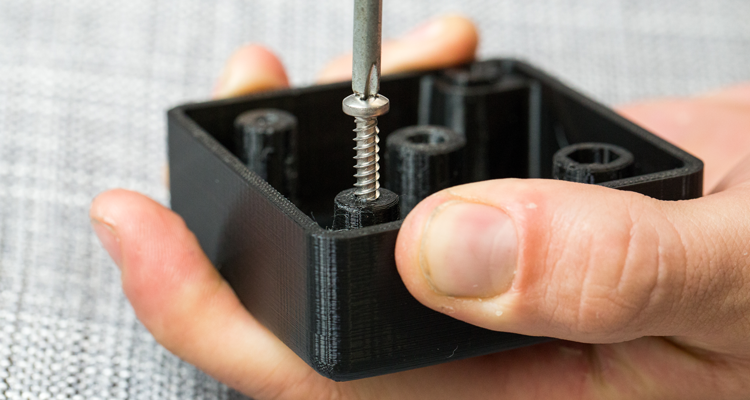
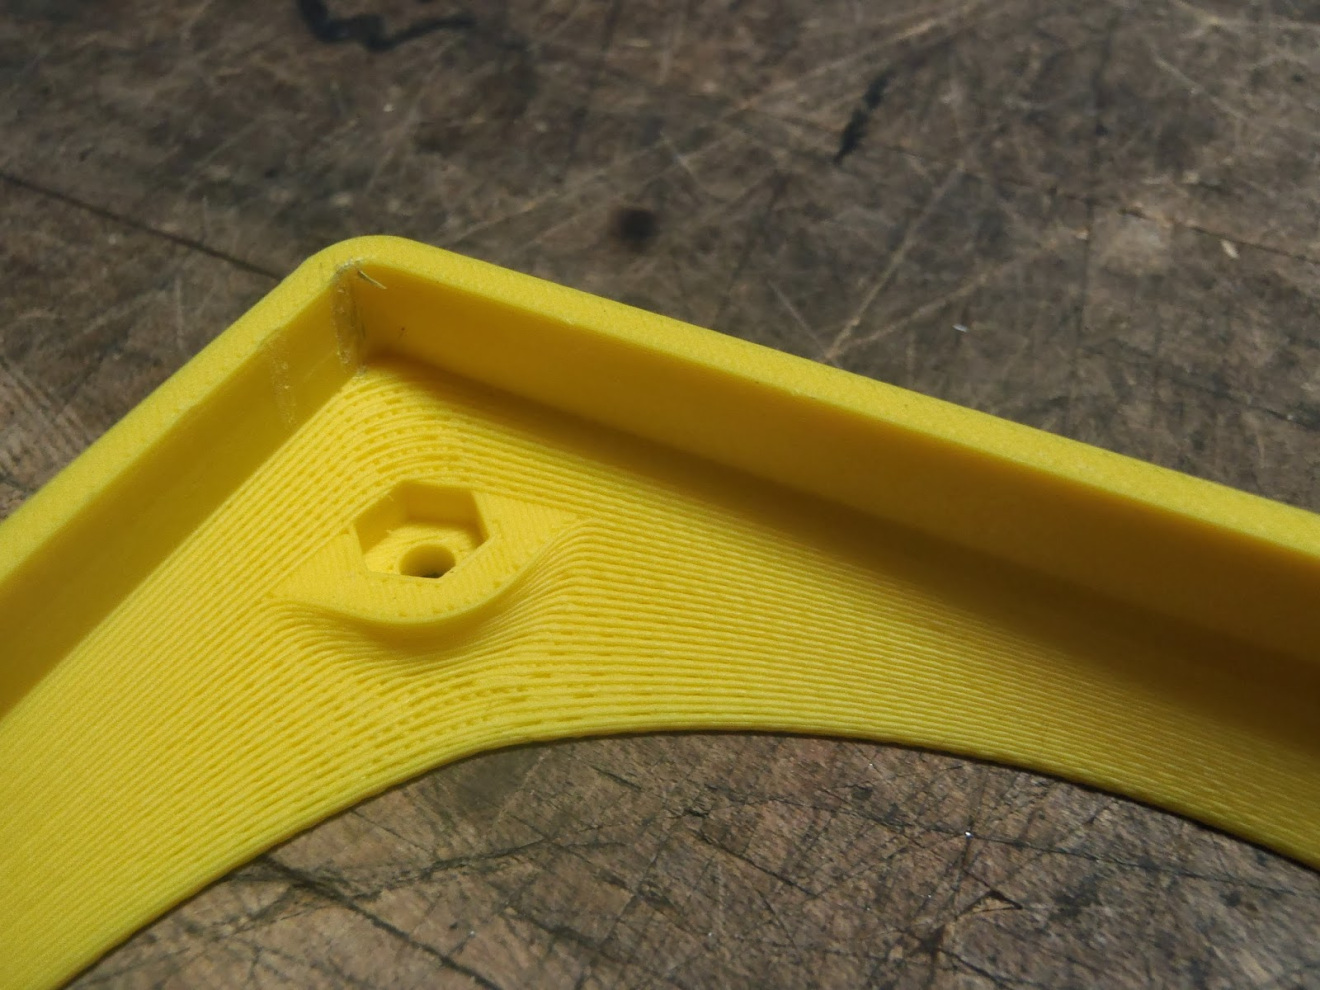
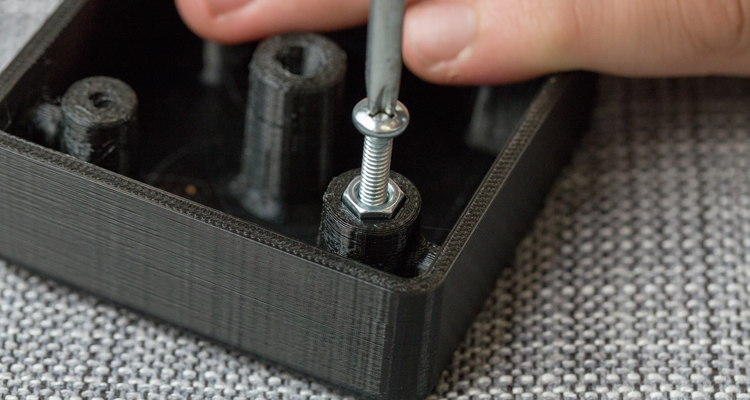
Captive Nut
A great technique for fastening is designing an inset in your model to hold a hex nut. This is great when you want to use machined bolts. It’s important to use your calipers to get exact dimensions and give enough tolerance for fitting your hex nut.
Heat set threaded inserts
Using high heat to melt metal threaded hardware into your 3D print. The inside of this is nicely threaded for precise machined screws while the outside is roughed with gripping pattern. When it’s melted into the plastic, it will grip nicely and fit snugly when the plastic cools down around it.
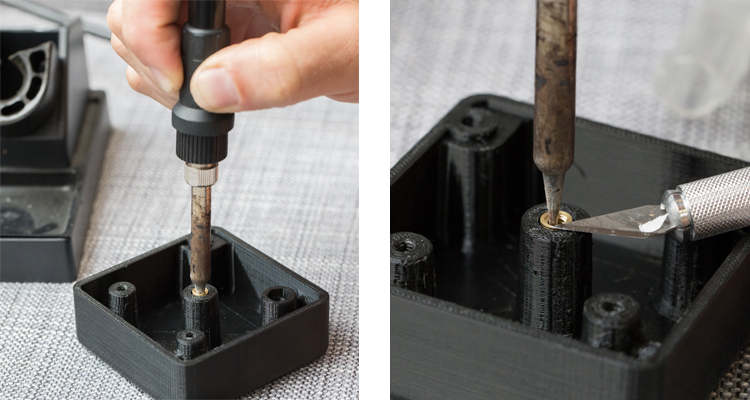
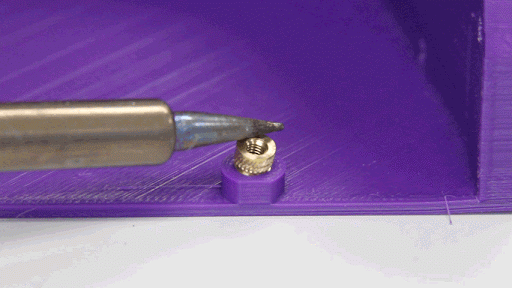
How to:
- Get a crappy soldering iron (not one of nice working ones from the BTU lab)
- Heat your iron to low and preheat the threaded insert. This should only take a few seconds.
- Align and place the insert on your model (use some tweezers)
- Use the tip of the iron and carefully push the insert into the plastic using little pressure. Once the insert is aligned flat with the top surface of the plastic, remove your iron.
Pro tip: practice on a test print first!!!